Tilt-Shift Photography
It’s all the rage these days, tilt shift photography and video. But what is it exactly? Tilt Shift is the process of taking a normal image, or video, and mimic a shallow depth of field in order to fool your eye to think the image is of a small miniature. Uhhh, what? Basically, if you’ve ever tried to take a picture of an action figure, micro machines, a lego car, etc you’ll notice that the depth of field, or how much of the image is in focus, is very limited. Usually just a part of the subject is in focus, with the things nearest to the camera and the things behind the subject completely out of focus. That’s how we’ve all been brought up to recognize ‘miniature’ photography. If you take photos of flowers, you’re likely to see the same effect. That’s due to limited depth of field caused by very small f-stops (or apertures) on your camera. Tilt Shift is normally achieved by using a Tilt Shift lens, which I’ll discuss a bit later, but you can also use post-image editors like Photoshop to do this as well. Typically, the best type of tilt-shift photography is aerial photos or images taken from higher up vantage points, but it can also work on many common photographs of groups of people. So how do you take a photo or video to make it look this way, and why?
The main difference between a normal photo you take every day and a Tilt-Shift photo all comes down to the focus depth of field. A normal photo will most likely have everything in the shot in focus, and as such your eye perceives this as a normally shot true to life full size photo. So if you take a photo from the window of an airliner of the city below, everything will be in focus from the closest terrain to the distant mountains. Now, if you shoot photo in the tilt-shift style, you’ll see that only a VERY select portion of the image is in focus, and almost immediately before and after that very limited part that is in focus it becomes very blurry. This will mimic that miniature type of photo and trick your eye into thinking, based on what your mind perceives as a normal depth of field for a normal photo, that this shot is actually of a miniature. Sadly, you can’t just use any ole’ camera to do tilt-shift photography or video, if you want to take photos in this manner you need a tilt-shift lens.

A tilt-shift lens is a special lens that’s designed to, as you take a photo, ‘swivel’ in place. What this will do is effectively cause that extreme depth of field blur by making the top and bottom parts of the image go extremely out of focus. These lenses are extremely costly, and they actually make them for video cameras as well, though it’s more of a stop motion video that is capture because the tilt-shift process needs a still image to get the effect. Canon, maker of digital still and video cameras, makes several nice and compact tilt-shift lenses at different zoom lengths. As far as I know, the Canon tilt-shift lenses are used the most often of the type. But this Canon lens costs upwards of $2,000 even when used condition! So how can you do this popular type of photography when you don’t have a expensive lens? Photoshop.

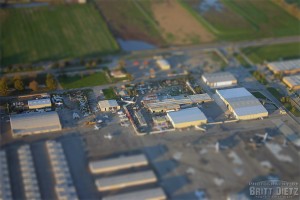
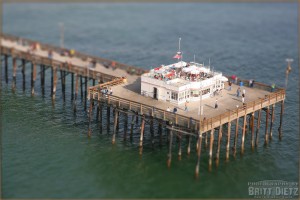
The process of mimicking a photo to look like tilt shift is actually easier than most people think. It takes an image editor like Adobe Photoshop to create the effect though, if you want full control over how the focus looks. There are websites out there such as Tilt Shift Maker that will allow you to upload an image and do basic tilt-shift mimicking over the web, but your customization of the focus and the depth of field is limited if not restricted to the basics. I prefer Photoshop myself, which all the images featured on this post were turned into tilt-shift photography with. Each of the shots on this page were taken from some of my aviation flights I’ve had, and were photographed out windows of helicopters or airliners. So how did I get them to look like miniatures? If you do a Google search for tilt-shift Photoshop tutorials, you’re bound to find plenty. One in particular I thought was very well documented was this tutorial which offers photo step by step instructions on how to complete the effect.
Assuming you know your way around photoshop, the basics pretty much are to create a very feathered selection of where you want the focus area to be and gradually (though quickly) become out of focus. You then apply a ‘Lens Blur’ to the invert of your selection you just made having the out of focus blur effect become rather dramatic after a short distance. Now, one major tip I have that will help your tilt-shift effect in photoshop look that much more real that most people either overlook or the methods they use can’t do anything about, take some time to THINK about what would be in focus if this was a real shot. Take for example the photo of the Boeing 757 taking off from the airport at the top of this post. If I just did the effect in photoshop according to most of the tutorials, the airplane and everything behind it would be in focus. What would be wrong with that? Well, since the 757 is in the air, technically the area BEHIND it wouldn’t be in focus at this point. The runway would be under it. Why? Imagine the focused area as a wall, a somewhat thick wall. Anything before or after that wall is out of focus. But that wall, even up in the air, is going to still be in focus. So if the airplane is in focus, the runway under it should be in focus too since the airplane is right above it. Make sense? So having the area behind the airplane in focus would ruin the effect. This also happens a lot, I’ve seen, with tall buildings were the top of the building or house is out of focus. If the whole image is of one house, then of course the top and bottom will be out of focus… but if it’s a city, the buildings (if they were miniatures) would be in focus from the base to the top of the building. Now I’m sure you’re asking how you fix something like this? Well, this is where some advance photoshopping comes in. You basically have to being back the areas that should be in focus. It takes some work, but when it’s all done, you’ll be left with a photo like this:

Good luck with your Tilt-Shift Photography!
UPDATE: JULY 15, 2010
Wanted to write a quick update on some new ways you can do Tilt-Shift photography, from your phone! I’ve seen a few different ‘apps’ out there that you can use to do HDRI photos from a mobile phone with a digital camera. Personally, I don’t have a iPhone so I’m not sure what they Apple App store offers as far as Tilt-Shift photography apps, but for the Android market I’ve found a wonderful app that does a great job, and pretty quickly too! 
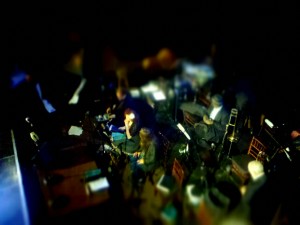
I use a Motorola Droid (first generation), and am always on the lookout for great apps for the phone. I discovered an app called ‘Vignette’ by neilandtheresa which offers many many different photography effects using the onboard camera. In the category of ‘Lens Effects’ they have Tilt-Shift L (Landscape) and Tilt-Shift P (Portrait). Just take a shot from a higher elevation (even just standing, but the trick is you want to have a slight down angle at the least for the best possible effect). The end result comes out pretty quickly, and does a great job! Here’s a sample of a shot I took with the phone and app at a vintage music club in Los Angeles. Click here for the Vignette Website.

Vignette Tilt-Shift App Example


Britt, love your stuff, especially the T/S stuff. I’ve made one of your pics my Pic of the Day, over at my blog that features only TS stuff, tiltshiftable.com. I have a link back to your blog. Hope you stop by!
[…] Britt Dietz is an aviation photographer from southern California, and I came across his nice blog (being a photo geek myself) and lo and behold, what do I find but TS stuff. I love this shot, as it looks like this toy airliner is just magically floating above a model runway. You can see more at his blog, here. […]